Istio Install Docker (for Mac & Windows)
Docker for Mac and Docker for Windows are designed to enable easily running containers on your local machine. The following instructions explain step-by-step how to do this.
Install Docker for Mac
Download Docker for Mac edge edition from here
Double click the DMG file to open it and then drag the Docker for Mac binary over to the Applications folder.

Now open the Applications folder and double click Docker.app

When Docker opens you will be prompted to authorize it with your system password.
After this is complete wait a few minutes and Docker for Mac will start.
Launch a terminal and type the following to confirm Docker is working as expected.
docker run hello-world
You should see something similar to the following.
Hello from Docker!
This message shows that your installation appears to be working correctly.

To generate this message, Docker took the following steps:
 1. The Docker client contacted the Docker daemon.
 2. The Docker daemon pulled the "hello-world" image from the Docker Hub.
    (amd64)
 3. The Docker daemon created a new container from that image which runs the
    executable that produces the output you are currently reading.
 4. The Docker daemon streamed that output to the Docker client, which sent it
    to your terminal.
Install Docker for Windows
Download Docker for Windows from here
- Double click the exe file to start the installation
- Follow the install wizard and authorize Docker with your system password.
- Click Finish to complete the installation.

Docker does not start automatically so we need to launch it from the Windows start menu.
Click Windows start button and search for Docker, then click on “Docker for Windows”

Check the whale in the status tray to confirm it is steady.

Launch a command window and type the following to confirm Docker is working as expected.
docker run hello-world
You should see something similar to the following.
Hello from Docker!
This message shows that your installation appears to be working correctly.

To generate this message, Docker took the following steps:
 1. The Docker client contacted the Docker daemon.
 2. The Docker daemon pulled the "hello-world" image from the Docker Hub.
    (amd64)
 3. The Docker daemon created a new container from that image which runs the
    executable that produces the output you are currently reading.
 4. The Docker daemon streamed that output to the Docker client, which sent it
    to your terminal.
Now that Docker is installed we need to enable shared folders
Right click the Docker icon in the system tray and click “Preferences”
In the new window click “Shared Drives” and then make sure you have selected the drives you will be using.
Then execute the docker run command shown below in a PowerShell to test it.

Enable Kubernetes
Docker edge version has built-in support for an all-in-one Kubernetes cluster. We are going to enable this and use it for the rest of the labs.
Open Docker preferences and go to the Kubernetes, click Enable Kubernetes box, and then make sure the radio button next to Kubernetes is selected as shown below.
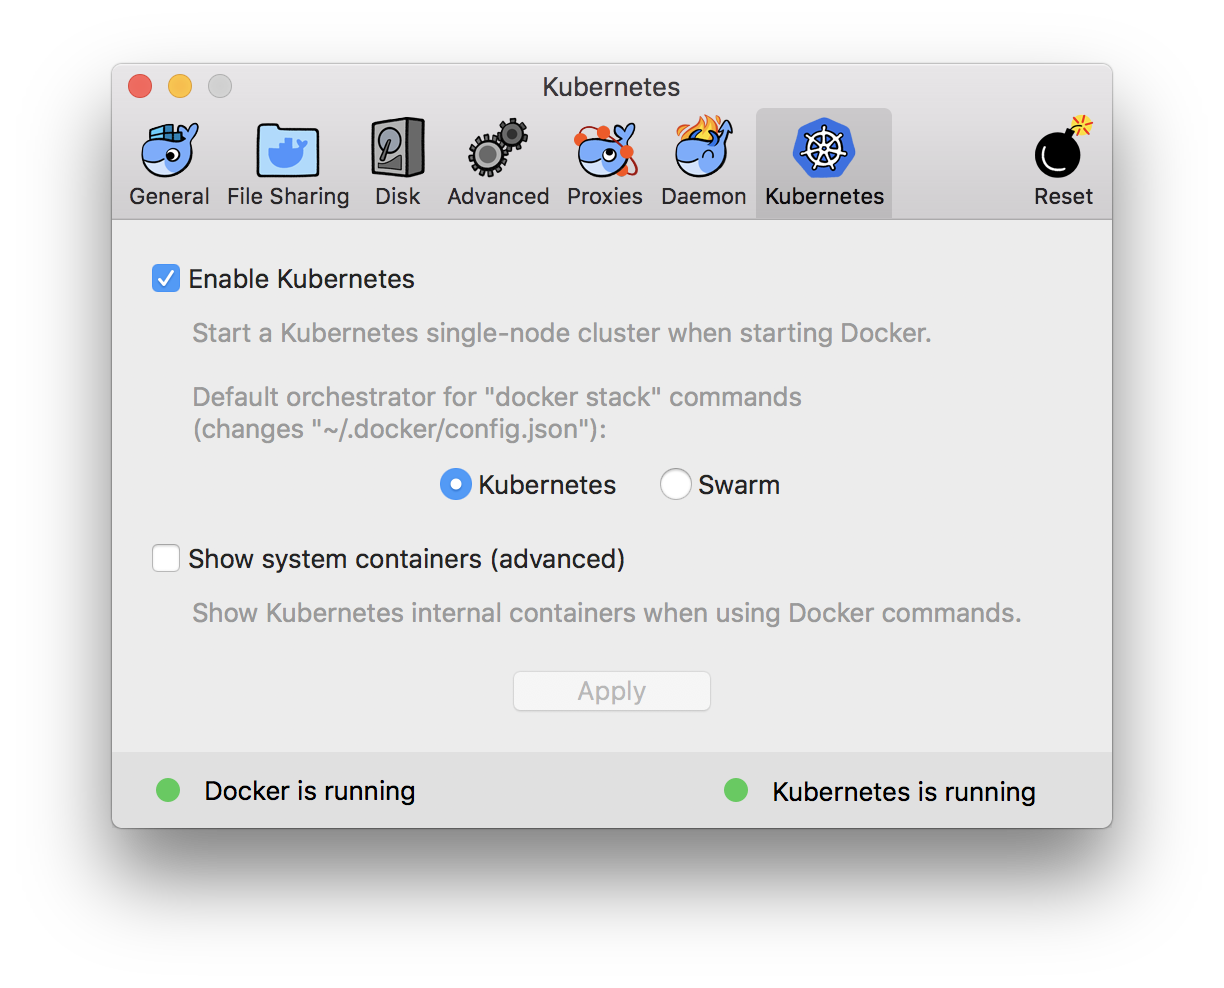
At this point you’ll notice the status at the bottom change to Kubernetes is starting. Once this is complete it will turn green and say Kubernetes is running
Test Kubernetes
Open a terminal and type kubectl get componentstatuses. If everything is running successfully you should see something like
